
Software testing is an important process in programming. It allows us to find bugs and issues before taking our apps live. Despite its importance, the belief that testing is a waste of time, especially for small-scale software, is a fact. This is debatable, but it’s always good practice to write test cases for any scale apps we develop, and React apps are no exception.
In the world of React development, Jest and Testing Library have become essential tools for writing and running tests efficiently. In this article, we will explore how to test your React apps effectively using Jest and Testing Library.
What is Jest?
Jest is a popular JavaScript testing framework developed by Facebook. It is widely used in the JavaScript and React communities for writing and running tests for JavaScript code. Jest is known for its simplicity, speed, and developer-friendly features. These features makes it a go-to choice for many developers when it comes to testing JavaScript and React code.
What is React Testing Library?
Testing Library is a set of JavaScript libraries that provides utilities for testing user interfaces (UI) in various JavaScript frameworks, including React. For React, the specific library you would use is called @testing-library/react. It is part of the larger Testing Library ecosystem, which includes libraries for other JavaScript frameworks like Angular (@testing-library/angular), Vue.js (@testing-library/vue), and more.
Testing Library promotes testing from the user’s perspective and encourages writing tests that closely resemble how users interact with your application. It provides a set of utility functions that make it easier to interact with your components and query the DOM.
Getting Started
To use React Testing Library, you’ll need a React project set up. If you haven’t done that yet, you can create a new React application using Create React App
npx create-react-app my-test-app
cd my-test-app
Both Jest and React Testing Library come pre-installed with Create React App. In addition, once a new application created, you can see a simple test file written for the app.js file in the src folder.
Writing Your First Test
Let’s start by writing a simple test for a basic React component. Suppose we have a component called Button that displays a button with some text. The component code looks like this:
// src/components/Button.js

import React from 'react';

const Button = ({ label }) => {
  return <button>{label}</button>;
};

export default Button;
Now, we create a test file for the Button component. In react, test files are named with the same name as the component being tested, followed by .test.js or .spec.js. For example, if you have a component named MyComponent, the corresponding test file should be named MyComponent.test.js.
So, create a test file for the button component with the name Button.test.js and add the following code to this file
// src/components/Button.test.js

import React from 'react';
import { render, screen } from '@testing-library/react';
import Button from './Button';

test('renders the button with the correct label', () => {
  const label = 'Click Me';
  render(<Button label={label} />);
  const buttonElement = screen.getByText(label);
  expect(buttonElement).toBeInTheDocument();
});
In this test, we use render from React Testing Library to render the Button component. Then, we use screen.getByText to find the button element with the text “Click Me” and finally, we use expect from Jest with the toBeInTheDocument matcher to check if the button element is present in the document.
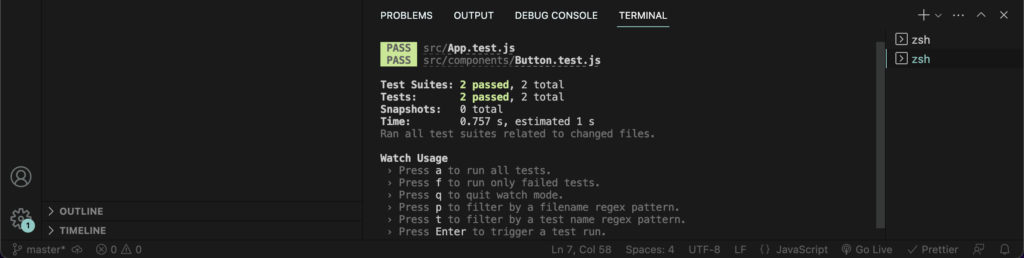
To run the test, execute the following command in your terminal:
npm testJest will execute the test, and if everything is set up correctly, you should see a passing test result in the terminal as shown below
Understanding React Testing Library Queries
Queries in React Testing Library help you find elements in the DOM using the same logic that a user would use when interacting with your application. Here are some commonly used queries
getByLabelText: Selects an element based on its associated label text.getByPlaceholderText: Selects an input element based on its placeholder text.getByText: Selects an element based on its visible text content.getByRole: Selects an element based on its ARIA role.getByTestId: Selects an element based on the value of itsdata-testidattribute.queryAllBy: Similar togetAllBy, but returns an empty array if no elements are found.findBy: Asynchronous version ofgetBy, used to query for elements that might appear after an async operation.findAllBy: Asynchronous version ofgetAllBy, used to query for multiple elements that might appear after an async operation.
Understanding User Interactions
React Testing Library allows you to simulate user interactions, such as clicking buttons, typing into input fields, and more. Use the query functions to find the elements, then use DOM APIs to simulate interactions.
For example, consider the following counter example. Whenever button is clicked, the counter value should increase by one.
import { useState } from "react";

function App() {
  const [counter, setCounter] = useState(0);

  function increase() {
    setCounter((count) => (count += 1));
  }

  return (
    <div>
      <h1>Counter</h1>
      <p data-testid="counter">{counter}</p>
      <button data-testid="button" onClick={increase}>
        Increase
      </button>
    </div>
  );
}

export default App;
To test this component, we need to simulate the button click and check if value of the counter increases. At this point the fireEvent or userEvent can be used to simulate user interactions with the selected elements
import React from "react";
import { render, fireEvent } from "@testing-library/react";
import App from "./App";
import "@testing-library/jest-dom";

describe("App component", () => {
  it("should increase the counter value when the button is clicked", () => {
    const { getByTestId } = render(<App />);
    const counterElement = getByTestId("counter");
    const buttonElement = getByTestId("button");

    // Check if the initial counter value is 0
    expect(counterElement.textContent).toBe("0");

    // Click the button
    fireEvent.click(buttonElement);

    // Check if the counter value increased to 1
    expect(counterElement).toHaveTextContent("1");

    // Click the button again
    fireEvent.click(buttonElement);

    // Check if the counter value increased to 2
    expect(counterElement).toHaveTextContent("2");

    // You can add more test cases if needed
  });
});
Understanding Assertions
React Testing Library works well with Jest, and you can use Jest’s built-in assertions or the additional matchers from @testing-library/jest-dom for more expressive assertions.
Here’s an example of how you might use both approaches to test a simple React component:
import React from 'react';
import { render } from '@testing-library/react';
import '@testing-library/jest-dom
import MyComponent from './MyComponent';

test('MyComponent renders correctly', () => {
  const { getByText, getByTestId } = render(<MyComponent />);

  // Using Jest's built-in assertion
  expect(getByText('Hello, World!')).toBeTruthy();

  // Using jest-dom matcher
  expect(getByTestId('my-element')).toHaveClass('highlighted');
});
Conclusion
In this article, we’ve explored how to use React Testing Library and Jest to write tests for React components. Remember that testing is an essential part of the development process. By writing tests that simulate user interactions and cover various scenarios, you can catch bugs early and maintain a high level of confidence in your codebase.
If you want to learn more about react testing and Jest, then you can check the following articles:
- Jest Axios Mocking in React: Testing API Responses and Errors
- Jest Tutorial: Testing In JavaScript
- How to Generate Fake Test Data With Nodejs
- Best Testing Libraries for React
- Beginner’s Guide to Jest Mocking
Thank you for reading.