If you’re using a Mac and need to find your IP address, whether for troubleshooting network issues or setting up a new device, you’ll be pleased to know that it’s a straightforward process. In this guide, we’ll walk you through several methods to discover your Mac’s IP address.
Method 1: Using System Preferences
- Click on the Apple menu: In the top-left corner of your screen, click on the Apple logo to open the menu.
- Select “System Settings”: In the menu, choose “System Settings” to access your Mac’s settings.
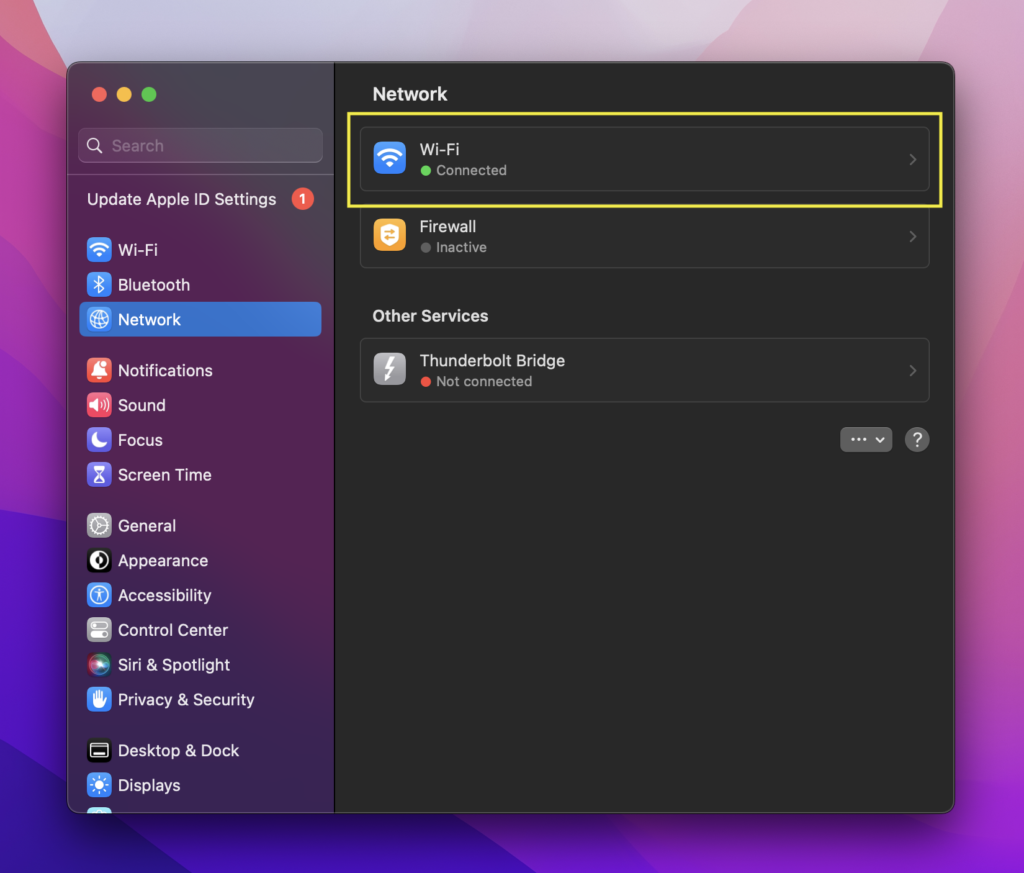
- Click on “Network”: In the System Preferences window, you’ll see various tabs.Go to the Network tab
- Select Your Network Connection: On the right-hand side, you’ll see a list of network connections. Choose the one you’re currently using, which should be labeled as “Connected” or “Wi-Fi.”
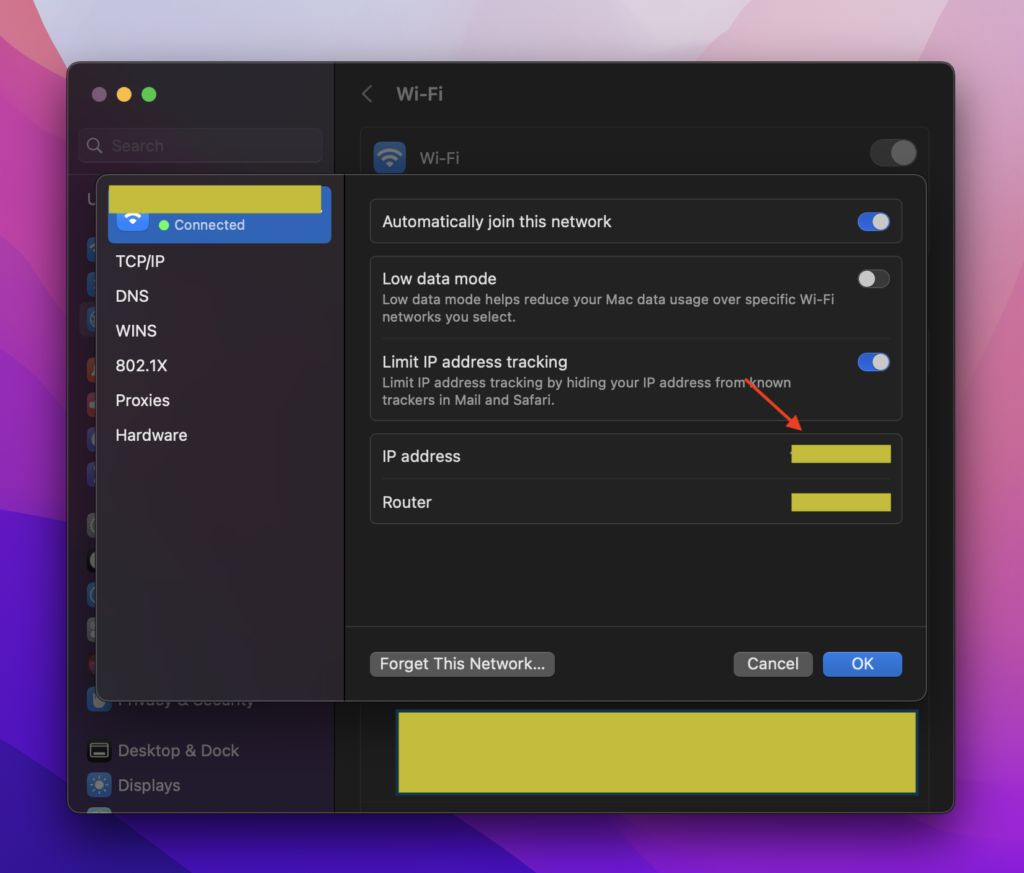
- View Your IP Address: After selecting your network connection, Go to the details and you can see your Mac’s IP


Method 2: Using the Terminal
If you’re comfortable with using the Terminal, this method can provide you with more detailed information about your network configuration.
- Open Terminal: You can open the Terminal by searching for it in Spotlight (press Command + Space and start typing “Terminal”).
- Enter the Command: In the Terminal window, type the following command and press Enter:
ifconfig | grep "inet " | grep -v 127.0.0.1- This command will display a list of network interfaces and their associated IP addresses.
- Find Your IP Address: Look for the line that corresponds to your active network connection (usually labeled as “en0” for Ethernet or “en1” for Wi-Fi). Your IP address will be listed next to inet.
Conclusion
Knowing your IP address on a Mac is essential for various tasks, such as configuring network settings, troubleshooting connectivity issues, or setting up a new device. Whether you prefer using System Preferences or the Terminal you now have multiple methods at your disposal to quickly find your Mac’s IP address.
